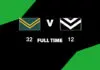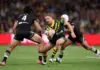


The Australian Kangaroos won the 2026 Rugby League World Cup final, defeating the New Zealand Kiwis at Suncorp Stadium.
Australia have won another World Cup, defeating their rivals 32-12.
They built a 24-6 halftime lead, with multiple players having their say about the end result.
Here is how we ranked every player on the park during Sunday night's World Cup final.
- Jacob Preston (Australia)
Preston delivered a tremendous performance, producing huge defensive efforts while also contributing to the Kangaroos' attack when called upon. He was Australia's most productive forward and played an important role in helping his side build and maintain their lead.
2. Cameron Munster (Australia)
His kicking game was excellent, consistently giving Australia's outside backs opportunities to contest attacking kicks and putting his teammates in favourable positions.
3. Cameron Murray (Australia)
Murray made an immediate impact when he got on the field, constantly putting pressure on New Zealand's defence and helping Australia build attacking momentum in the red zone.
4. Tino Fa'asuamaleaui (Australia)
Tino made an excellent start, producing strong numbers through his running game and contributing defensively. His first stint was particularly effective, providing Australia with the impact it needed through the middle.
5. Liam Martin (Australia)
Martin set the defensive intensity for Australia early and backed that up with two tries in the first half. His running lines were excellent, although his influence dropped away somewhat in the second half.
6. Bradman Best (Australia)
Best was one of Australia's most influential players, producing an excellent performance in both attack and defence. He excelled in the first half, scored a try himself, and once again showed his ability to perform in big games.
7. Tom Dearden (Australia)
Dearden's passing selection and timing were superb, allowing him to consistently put his teammates into dangerous attacking positions. He played a major role in creating several of Australia's tries and played an important part in their attacking success.
8. Jack Bostock (Australia)
Bostock continued to dominate aerial contests and proved to be a major attacking threat for Australia. With nine tries in the World Cup, two against the Kiwis in the final, he showed his outstanding finishing ability and importance to the Kangaroos' backline.
9. Harry Grant (Australia)
Grant provided Australia with excellent service from dummy-half, increasing the speed of the ruck and helping the team execute its attacking structures. He played his role extremely well and was an important part of the Kangaroos' ability to build pressure.
10. Patrick Carrigan (Australia)
Carrigan produced a strong performance through the middle, using his running game to help Australia neutralise New Zealand's forward pack. His work rate and ability to generate momentum were important contributions to the Kangaroos' control of the game.
11. Joseph Tapine (New Zealand)
Tapine quietly produced an important performance through the middle, finishing with the most run metres for New Zealand. He continued to work hard despite the pressure from Australia's forward pack and was one of the Kiwis' more reliable performers.
12. Ronaldo Mulitalo (New Zealand)
Mulitalo brought plenty of intensity throughout the game, particularly through his defensive efforts and willingness to compete for kicks. His work in the aerial contests made him an important contributor for New Zealand, even as Australia found ways to maintain its attacking pressure.
13. Kotoni Staggs (Australia)
Staggs started the game with the right intensity and produced a solid performance on both sides of the ball. His overall contribution was important to Australia's edge play, particularly through his physicality and defensive work.
14. Reece Walsh (Australia)
Walsh wasn't given the same opportunities to influence the game offensively, but he produced some positive touches; his overall involvement was a net positive, and he wasn't able to reach his usual attacking heights.
15. James Fisher-Harris (New Zealand)
Fisher-Harris made a strong start to the game and recorded the most run metres among New Zealand's forwards in the first half. He provided the Kiwis with some much-needed momentum through the middle, although his influence was less noticeable as the match progressed.
16. Isaiah Papali'i (New Zealand)
Papali'i was heavily involved in the early stages, taking plenty of runs and helping New Zealand generate forward momentum. However, his influence on the attacking side of the game was limited in the first half, although he improved his contribution by scoring a try in the second half.
17. Kalyn Ponga (New Zealand)
Ponga showed some promising ball movement and attempted to create opportunities for New Zealand's attack. However, the Kiwis struggled to capitalise in the red zone, while his two errors and moments of impatience as his side fell behind affected his overall performance.
18. Tom Trbojevic (Australia)
Trbojevic struggled in the aerial contests and was exposed defensively when New Zealand found opportunities to attack. Although he managed to score a try, his difficulties defending Australia's right edge prevented him from producing a more complete performance.
19. Jeremy Marshall-King (New Zealand)
Marshall-King was generally serviceable in helping New Zealand get to the right areas of the field and organise its attack. However, he struggled at times to get the ball to Ponga and the halves, limiting the Kiwis' ability to build attacking pressure.
20. Dane Gagai (New Zealand)
Gagai had some awkward moments defensively when Australia moved the ball towards his edge, making it difficult for him to contain the Kangaroos' attacking threats. He did, however, compete well for some kicks and challenged Bostock in the aerial contests.
21. Casey McLean (New Zealand)
McLean provided an important attacking contribution by scoring New Zealand's try. Unfortunately, his game was cut short after he was taken off for a head injury assessment and subsequently failed the assessment.
22. Kodi Nikorima (New Zealand)
Nikorima provided a quality try assist for Casey McLean's try, showing his ability to create opportunities when involved in the Kiwis' attack. However, his involvement largely disappeared as the game progressed, limiting his overall influence.
23. Briton Nikora (Australia)
Nikora had very little involvement in the first half, recording just one touch and one run. He became more involved after the break, but had the added difficulty of moving into the left-centre position after McLean's departure.
24. Isaah Yeo (Australia)
Yeo played his role through the middle when required and helped Australia maintain its forward structure. However, he wasn't as influential as some of the other Australian forwards, particularly Murray and the back-rowers.
25. Erin Clark (New Zealand)
Clark made some poor decisions in New Zealand's defensive line, contributing to the difficulties the Kiwis experienced when defending Australia's attack. However, he did provide some positive ball-playing through the middle third.
26. Moses Leota (New Zealand)
Leota didn't have the same impact he has produced throughout the World Cup, with his contribution noticeably quieter than expected. Recording just four runs in his first stint, he struggled to establish the forward momentum New Zealand needed.
27. Jahrome Hughes (New Zealand)
Hughes struggled to produce the kicking game New Zealand needed, with several shorter-distance kicks at times. His inability to consistently apply pressure through his kicking limited the Kiwis' opportunities to gain field position.
28. Keaon Koloamatangi (Australia)
Koloamatangi was the least involved runner among Australia's forwards and struggled to make a significant impact. He wasn't as influential as his teammates through the middle and didn't provide the same level of forward momentum.
29. Reuben Cotter (Australia)
Cotter made an important contribution defensively, helping anchor Australia's middle third when New Zealand tested the Kangaroos near their own try line. His defensive work provided stability during a period when Australia needed to withstand pressure.
30. Jamayne Isaako (New Zealand)
Isaako struggled defensively against Australia's left edge, which became a significant problem for the Kiwis. Multiple errors also contributed to an underwhelming performance and made it difficult to influence the game.
31. Phoenix Crossland (New Zealand)
Crossland provided a positive impact after coming onto the field, helping New Zealand increase its ruck speed. However, the Kiwis continued to struggle to turn their attacking opportunities into points, limiting the overall impact of his contribution.
32. Naufahu Whyte (New Zealand)
Whyte made an error that directly led to an Australian try, which significantly hurt his performance. He also struggled to generate metres in his runs, as we have seen this season.
33. Xavier Willison (New Zealand)
Willison struggled defensively at times and didn't generate the yardage New Zealand needed from its forward rotation. He made defensive mistakes and struggled with the ball in hand, leading to a poor performance.
34. James Tedesco (Australia)
Only played the last six minutes of the game as Australia had a strong lead.